I found my machine quite by accident as I was running through Target looking for something else. Again, I ran to the internet to read reviews, and ultimately picked up a Delonghi EC155 15 BAR Pump Espresso and Cappuccino Maker![]() . I paid about $100, I’ve seen these now for $80-$90 at Amazon. A bonus, for me being a computer geek, is there is a community of hackers posting mods to this machine that allows it to make EVEN BETTER shots.
. I paid about $100, I’ve seen these now for $80-$90 at Amazon. A bonus, for me being a computer geek, is there is a community of hackers posting mods to this machine that allows it to make EVEN BETTER shots.
There are definitely some drawbacks to this machine. First, it’s short…as in the height of the machine. I have to use a shot glass to pull my shots, because a cup won’t fit under the portafilter. Second, the pump is like a first generation Keurig machine…it’s not super loud, but it vibrates the entire machine which can make the shot glass scoot around on top of the spill plate. All of these things are tolerable.
But, the steam wand is a complete joke. Like all these lower cost machines, they attempt to put an attachment on there that allows pretty much anyone to make steamed milk without any skill at all. The problem is that it’s too short (which is ironic because of how low to the counter top it already is) and you don’t have great control. HOWEVER, it does work once you get the hang of it. The biggest tip here is to vent the thing before you use it. It will vent a considerable amount of water before any steam starts to come out. You don’t want the water in your milk. If you are a hacker, there’s a mod on the internet that explains how to take the steam wand from a Rancilio Silvia machine and retro-fit it.
I’m not sure I want to do this much surgery to my machine, but there’s another group of people that figured out the thread on the steam wand tip is metric M6 – 1. You can get a stainless steel cap nut (sometimes called an acorn nut) and drill a hole in it and you have an approximation of a pro tip. I tried it…result below.
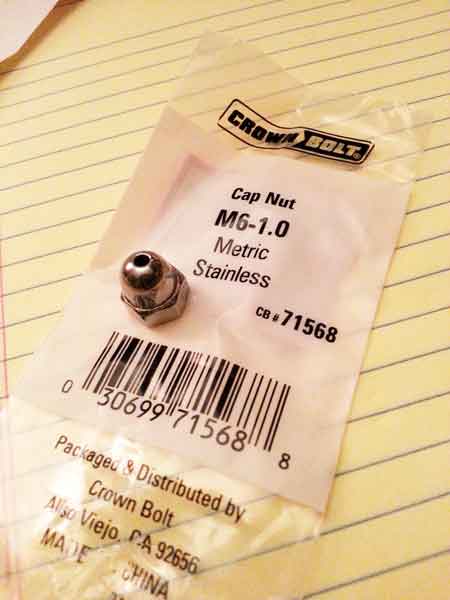
This didn’t really work out for me. The main issue is that steam wand is made entirely too short after this mod. I’m getting results capable of latte art with the stock wand, so it’s not imperative I find a mod here. But, I did find this OEM tip from another post. Knowing this is a standard thread size means options like this are open. This tip, plus a lock nut make the wand usable for a small pitcher (12oz). So, I play around with both now.
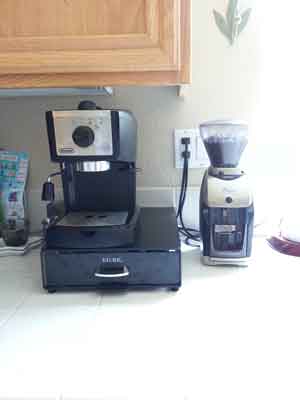
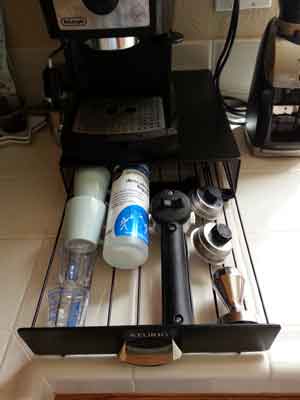
Since the machine is so low to the counter top, raising it up is a must. I found a Keurig K-cup holder that worked out pretty perfectly. It was $24 at Target. It gets the machine up off the counter top nicely and it holds the portafilter, filter baskets, tamper and shot glasses. It also has a neat rolling feature that allows the machine to move forward and back so it can store under the cabinet but easily roll out for use.
I did depressurize the filter baskets. What you ask is that? Well, the filter baskets have a gasket and a spring valve that helps to regulate the pressure of the water through the coffee grounds. While this is good for some, I want as complete control over the process as I can get with this machine. So, removing this valve allows me to control the pressure with the way I grind the beans and tamp the filter basket. After reading up on this, I did this in a non-permanent, completely reversible way which I’ve made a video of here.

Another thing I did, which I noticed quite by accident is swap the filter gaskets. As you can see in the above image, there’s large and a small gasket. I don’t know if this was a mistake or not, but out of the box, the “single” filter basket had the larger gasket in it. So, I swapped them such that the gasket size matched the filter basket size (the single has the small one, etc).
I also picked up this La Pavoni 51mm basket. You have to take pliers and flatten the lip on the thing yourself, but I really like the results with this filter basket. So, I re-pressurized the stock ones for my wife to use (watch the video).
Seattle Coffee Gear sells a non pressurized filter basket in the double shot size that works with this machine, but it’s out of stock, and has been for a very long time. Another place that carries a La Pavoni basket that might fit is Espressotec.
So far, for $100, this has been an excellent buy. Several sites rated this as a top budget machine, and it’s the only one I’m aware of that is actually pump driven in this price range. It also heats up in only about a minute, which is excellent when you want to make a drink “right now.”
Since the Delonghi EC155 is the machine I have, I decided to gather the facts that I’ve aggregated from around the web along with things I’ve discovered.
Get a stand
Get something to put under the machine so that the steam wand is raised significantly. It will make it way easier to use.
Vent the boiler
Before you pull your shot, turn on the pump with the portafilter detached. That will help clear out the shower head area of anything that may have back washed in there from the last shot.
Vent the steam wand!
The steam wand simply sucks on this thing. BUT, it can be tamed. The first thing you need to do is vent the thing before you try to use it. All steam wands will hold a little condensation that needs to be vented, but the thing on this machine will retain a significant amount of plain old water. You need to clear that out completely before you start steaming your milk. When I first realized exactly how much water was stuck in that pipe it was no wonder the steaming process wasn’t working properly.
The frothing attachment is an annoyance, but if you vent the steam wand completely, it will work quite well.
Filter and Tamper size
The consensus on this is that the portafilter uses a 52mm basket. If you want that after market basket from Seattle Coffee Gear, you can find it here if it ever comes back in stock. The other basket that works from La Pavoni is also out of stock everywhere. You have to flatten the lip on the thing yourself, but it works very nicely. With that in mind I bought this tamper since the built in one is lame. Finding a 52mm tamper that wasn’t stupidly expensive was hard, but this 51mm model was workable for me. It’s really heavy and has been working out super.
Depressurizing the filter baskets.
Your mileage may vary, but I did it. I’m happy I did it. The first shot I pulled after doing this was significantly better than all the shots pulled before I read about this trick. Doing this allows you to be in control of the pressure through the grounds. Fair warning though…you need to work on your tamping skills.
Hello, the pressurized filter of the ec155 works in the filter holder of the ec145c
This machine is great despite budget-class :). I’ve read somewhere that you can try plug/blocking the two holes on top of the plastic steam tip (with toothpicks etc) to get better steamed milk.
I just picked one of these up. I’ll be doing the Rancilio Wand swap out as soon as I get chance.
One thing I noticed straight away is that if you remove the spill plate you get an extra bit of height to fit the cup under.
Just curious, I saw the video about depressurizing and was kinda wondering what’s preventing you from putting everything back the way it was? I mean, eliminate the plastic pressure thing entirely and just put the filter itself back in the gasket. I tried it, and may have over tampped, but it seemed to have worked without any issues and it gives a flat bottom so you can tamp on your counter without having to balance on the screw nozzle thing.
I guess the only major downside would be how you get rid of the puck. The filter can come out with the puck.
That’s what that little “flip” thing is for on the handle…you click that up over the lip of the basket before you knock the puck out.
Tim,
There’s really nothing preventing you from doing that. But, I eventually went the route of cutting the bottom plastic off the portafilter and got a 3rd party basket and created a bottomless setup.
Thanks for reading!